Convert your windows WSL2 into a usable operating system with GUI
With GUI on your Linux you can install and use any Linux software of your choice without dual booting...

The Windows Subsystem for Linux (WSL) was announced at //Build 2016 in April 2016. It enables users to run a GNU/Linux environment including most command-line tools, utilities, and applications directly on Windows. This eliminates the need to dual boot your PC/laptop just to gain small Linux functional needs.
It is ideal for scholars who are trying to learn Linux functionalities, commands, and other Linux OS-based features. Installing Linux on Windows can now be done easily by installing Linux like an app thanks to WSL, no more dual booting.
Dual booting is fun, don't get me wrong. It's just that it’s not a straightforward task especially if you are a beginner…sure once you get the hang of it, it's easy-peasy but sometimes you just want to get things running fast…not fight grub rescue.
So WSL is all wonderful, a life and time saver. It's like a small heaven on earth. However, our heaven has its shortcomings. WSL only gives you Linux terminal access. It doesn’t offer any graphical user interface whatsoever which begs the question: What's the fun in that?
I personally started researching about the topic because I had used VM’s before they worked fine however I wanted to go fully native...you know like a pro😎.WSL takes lesser resources compared to VM’s its not perfect but it gets the job done.
For this guide, you will require WSL installed. Here is a nice tutorial on how to install WSL on Windows 10. If you don't have it installed already. We can’t test all available Linux WSL distros available so for this guide I will be using Ubuntu as my distribution of choice.
I’ll cover 2 parts:
Part 1: Windows 11 GUI with WSLg
Part 2: Windows 10 GUI with WSL and VNC Server
Part 1: Windows 11 GUI with WSLg
If you're using Windows 11, WSL now comes packed with WSLg (Windows Subsystem for Linux GUI). WSLg enables Linux GUI apps installed on WSL to be accessible on Windows as native apps. They are not that native yet, WSLg utilizes RDP technology to remote access the Linux GUI app.
Installing WSL on Windows 11
For WSL to work on Windows 11 two Windows features have to be enabled.
- Windows Subsystem for Linux
- Virtual Machine Platform
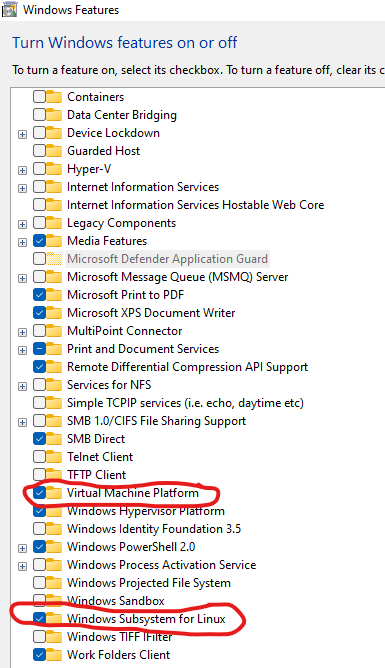
After enabling the two features and rebooting the PC. You are now ready to use WSL.
Update WSL
wsl --update
Install Ubuntu distribution on Windows 11 WSL
Method 1
Installing Ubuntu wsl distro on Windows 11 using CMD.
wsl --install -d Ubuntu
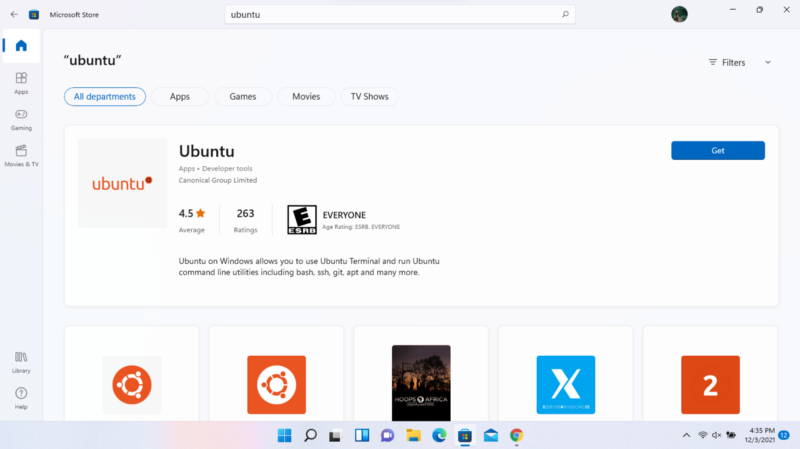
Method 2
If the terminal method of installing is too confusing for you, you can install the WSL Ubuntu distro from the Microsoft Store, just ensure the program features we talked about are enabled.
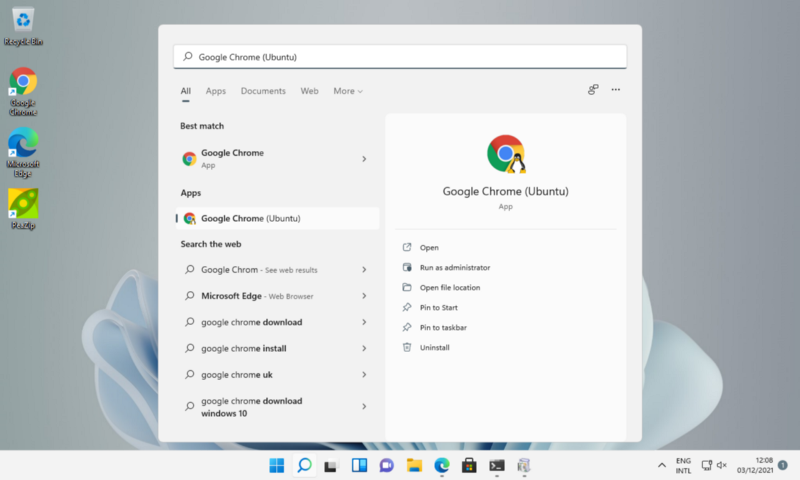
Installing Chrome on Windows 11 WSL
Once the installation is done you can launch Ubuntu WSL by typing ubuntu on the CMD or through GUI when you search for ubuntu on Windows search.
Run the following on your WSL Ubuntu distro to install the Chrome browser.
## Update list of available packages
sudo apt update

## Google Chrome
cd /tmp
sudo wget https://dl.google.com/linux/direct/google-chrome-stable_current_amd64.deb
sudo dpkg -i google-chrome-stable_current_amd64.deb
sudo apt install --fix-broken -y
sudo dpkg -i google-chrome-stable_current_amd64.deb
Once installation is done you can now access the Linux Chrome installed on WSL when you search for it on Windows search.
NB: If your PC does not have proper specs consider installing something light. Chrome is memory and processor-intensive and may crash.
For more on WSLg follow the guide: https://github.com/microsoft/wslg
Part 2: Windows 10 GUI with WSL and VNC Server
Unlike Windows 11 windows 10 does not come pre-installed with WSLg for this reason we have to come up with a different solution for the problem.
Configure VNC on Ubuntu
We’ll start by configuring VNC on our Ubuntu WSL.
Before anything update the package list:
sudo apt updateInstall the XFCE desktop environment on our Ubuntu WSL
sudo apt install xfce4 xfce4-goodiesAfter the XFCE installation, install TightVNC.
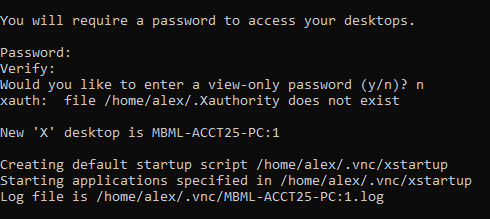
sudo apt install tightvncserverTo finalize the installation we need to set the password for the VNC connection to do that run the below command on the WSL.
vncserverYou will be asked to input a password and verify the password.
NB: The password must be between six and eight characters long. Passwords with more than 8 characters will be truncated automatically.
Once you are done you will be asked for an option to create a view-only password. Choose "no". A view-only password gives limited access to the user using the password for instance with no keyboard or mouse access. Practical when you want to show someone a demonstration.
The process then creates default configurations and ends gracefully.
Once that's all setup, we then need whenever we start or restart the VNC server to start our desktop environment if it's not yet started.
To do that we need to edit ~/.vnc/xstartup
Run:
echo "startxfce4 &">>~/.vnc/xstartupThis will add startxfce4 & at the end.
Installing VNC Viewer and Remote connecting
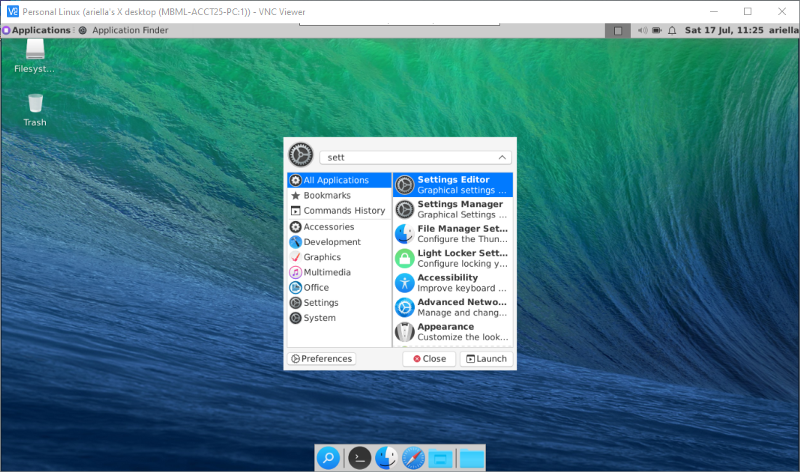
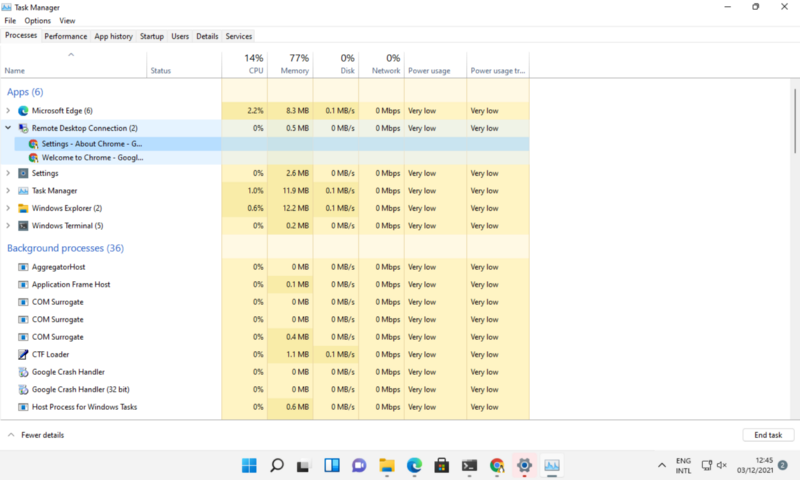
On the main host (The Windows PC) we need to install a VNC viewer to remote access the WSL2 Linux.
Download here
Notice: In the screenshot above after starting the VNC server you are given a name to connect to it.

It is mostly the computer name then a colon append by a number that gets incremented automatically i.e. if :1 is in use it automatically creates :2 and so on. This removes the need for using an IP to connect instead we just use the name…let the PC worry about the IP stack.
We then create a connection using the VNC viewer to our WSL2 UbuntuOS.
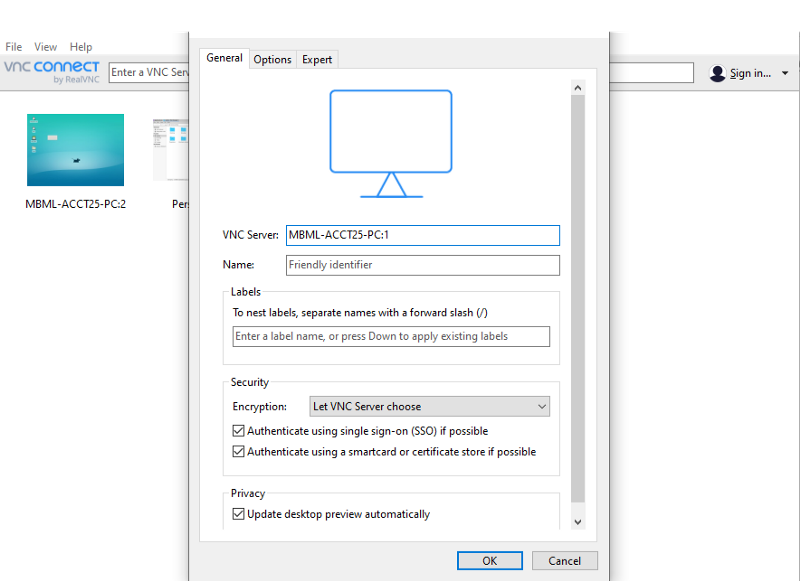
NB: You will be required to input the password you created.
You can change the picture quality to high instead of automatic in the options section.
Start VNC using Script
On a regular Ubuntu PC, we would use systemd to start, stop, and restart VNC as needed, like any other service.
However, WSL2 works like docker containers. It is impossible to set up systemd since it’s not yet supported.
NB: It is possible to make systemd work using systemd-genie for simplicity's sake we’ll just use a script.
Why do we need the script?
Well, we want our VNC server to automatically start at :1 every time we start the VNC server.
If the service is already running we want it to kill the current :1 service running and start a new :1. This is helpful so that our VNC viewer always connects at :1.
Run :
nano ~/vncstart.shAdd the following:
#!/bin/bash
vncserver -kill :1 > /dev/null 2>&1
rm -f /tmp/.X1-lock
rm -f /tmp/.X11-unix/X1
vncserver :1 -geometry 1366x768
Give the file execution rights.
chmod u+x ~/vncstart.shNB: If you were in another directory navigate to the home directory cd ~
Run:
./vncstart.shNotice: If you run the script several times it will always start at the VNC server at :1.
To start the VNC server always use the script.
Conclusion
With the GUI on your Linux, you can install and use any Linux software of your choice without dual booting.
It is not recommended to edit Linux files directly from Windows. However, with the GUI, you can install a code editor of your choice to make changes to files as you wish.
Below is a sample of my installation: